Learning how to install door hinges can be intimidating if you’ve never had to do so before. It always helps to have a guide to refer to for a better idea.
When installing door hinges, it’s important to be sure you get all the steps right, or your new doors may not hang properly and will look awkward to boot. The good news is that installing door hinges isn’t very difficult, and anyone can do it if they take their time and follow the steps below carefully.
You’ll need some basic tools like a hammer, screwdriver, saw, and leveler, as well as screws, hinges, and other parts you already have or can purchase at any hardware store.
This guide will walk you through the process of how to install door hinges in 10 easy steps.
Contents
- 1 Before You Start
- 2 Step 1: Determine The Distance Between Doors
- 3 Step 2: Choose Your Hinge Type
- 4 Step 3: Mark and Drill Hole Spacing
- 5 Step 4: Test Fit
- 6 Step 5: Attach Hinge
- 7 Step 6: Adjust Gap
- 8 Step 7: Prime, Paint, And Finish
- 9 Step 8: Assemble Interior Side Of Door
- 10 Step 9: Secure Interior Side Of Door
- 11 Step 10 – Measure, Drill, Prime, And Paint Exterior Side Of Door
- 12 How To Install Door Hinges: Final Thoughts
Before You Start
Mounting hinges on a door is a very doable job-but you need to make sure that you have your measurements right. If you get them wrong, it can lead to all sorts of problems, like door openings that are misaligned or not level.
So before you start, set out your hinges and measure twice, and cut once. For example, take measurements for each mounting hole with a tape measure so that you know where each hinge needs to go; if possible, get someone else’s opinion as well.
Step 1: Determine The Distance Between Doors
Measure your doors by placing a measuring tape between each door’s hinges. Make sure to measure from hinge to hinge on both sides of each door. Your measurement should be accurate down to a fraction of an inch; if not, you may have difficulty installing your hinges correctly.
Step 2: Choose Your Hinge Type
There are many different types of door hinges out there-including decorative varieties designed for use with fine cabinetry and/or furniture-but most household doors will use what is known as a standard hinge.
For example, most interior closet doors feature standard hinges that attach at one end and swivel on the other (for 360-degree movement). Standard exterior hinged doors attach at both ends and do not rotate.
Step 3: Mark and Drill Hole Spacing
Mark your desired hole spacing on each hinge. Don’t skip pinning-this will allow you to easily align each hinge with its matching door jamb during installation. Insert a hinge pin into one of your hinges, then slide it over an open door and push it up against a door jamb or post. While pinning, note how far apart your marks are.
Repeat with all four hinges, then drill corresponding holes into your doors at these distances using a drill/driver and 1/8-inch bit.
Step 4: Test Fit
Start by test fitting your door hinges on your bedroom door (or another installation surface of your choice). This is an important step as it’s possible that you might have measured it slightly incorrectly. If everything isn’t quite lining up, take a small file and gently smooth out any imperfections so that it matches up properly.
It’s also possible that you’ve already put in your measurements correctly but somehow have a broken piece. If you find that either of these issues has occurred, simply return your hinge pieces (or contact customer service) and make sure that everything is working correctly before proceeding with the installation.
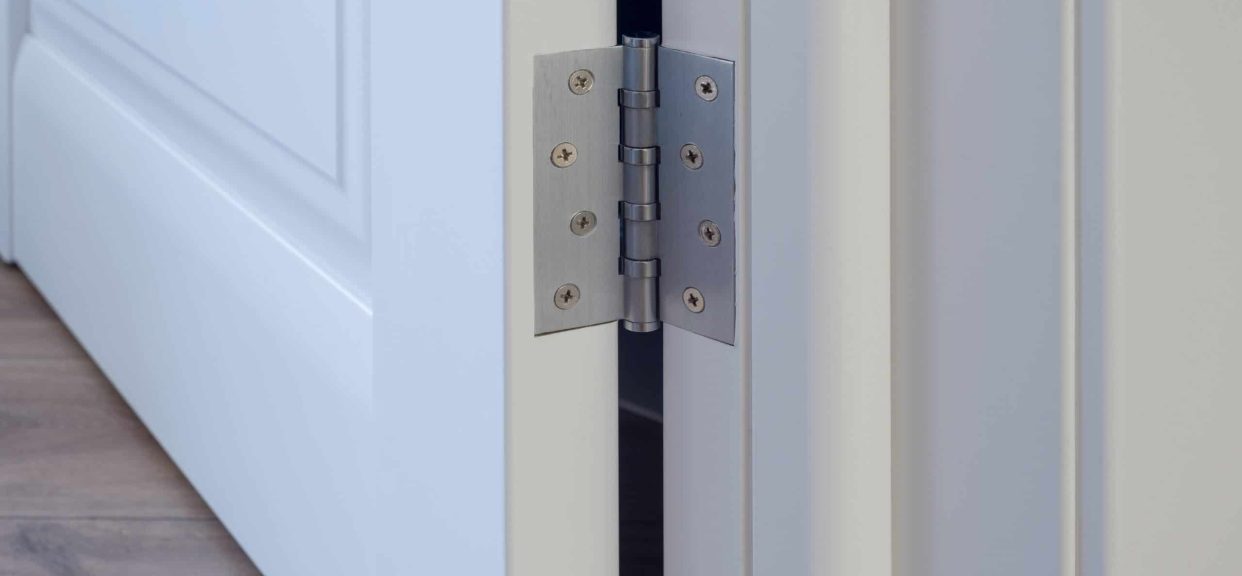
Step 5: Attach Hinge
Assemble and install the door hinge on the frame, as well as the strike plate for doors that require it. Then, lift the door into position on hinges and tighten the screws. For most doors with a full-mortise hinge-also called a European-style hinge-the hinge should be installed just below or above the center of each door (check your hardware pack for specific instructions).
To correctly measure where to place your hinges, you’ll need access to both sides of your door. Place one end of a tape measure at one side of each hinge’s pivot point (usually located at or near its edge) then move toward its opposite side until you reach its corresponding edge; repeat with a second tape measure at the second side of each hinge’s pivot point.
Step 6: Adjust Gap
Door hinges are standardized so that they fit most doors; however, they can still be finicky. If your door is a little off, adjust the gap between it and your new hinge by loosening or tightening screws on either side of your door.
You want them aligned perfectly-this will ensure that your door closes and opens properly. Repeat steps 4 and 5 for every hinge you’re installing. When finished, close each door to check for alignment issues. If you spot any (or if something just doesn’t feel right), take out your wrench and make adjustments as needed.
Step 7: Prime, Paint, And Finish
Once you have your door prepped, it’s time to paint. For a nice, even finish, spray or roll on two coats of paint. Allow each coat to dry before applying another. You can also use a brush and apply some finish-specific stain before painting; just make sure you’re using the right kind of brush for your project!
For example, if you want an oil-based stain on your door (they typically don’t hold up as well as latex stains), use a natural bristle brush and allow 24 hours of drying time between coats. Sometimes people like to do this step before even installing door hinges, but this all depends on the preference of the installer.
Step 8: Assemble Interior Side Of Door
This is a simple process, but there are a few steps that will help you get through it successfully. In addition to pre-drilling holes and verifying your measurements, you’ll need a power screwdriver and an Allen wrench or hex key (depending on your door).
The Allen wrench or hex key is used for loosening screws that don’t have room for regular pliers. A tape measure will come in handy as well. Take these tools with you when purchasing your hinges so that you can find them easily at home when it comes time to install them.
Step 9: Secure Interior Side Of Door
Place screws through the top of the hinges into the door frame. Secure by twisting with a screwdriver until everything is tight. Repeat on the other side of the door frame. Close the door and test the hinge. If the door won’t close or closes crookedly, repeat the installation process before moving on to the next step.
Repeat steps 1–7 for each hinge on the interior side of the door and then move on to Step 9.
Step 10 – Measure, Drill, Prime, And Paint Exterior Side Of Door
First, measure one inch from the hinge and mark a dot. Do so for the other side as well. Next, drill pilot holes for screws at points you’ve marked. Use 3/8 bit for 1 1⁄2 diameter hinge pin and 5/16 bit for 2 diameter hinge pin.
For larger-sized hinges, refer to instructions for the hinges themselves or contact the manufacturer directly (most will supply instructions). Hanging a door that fits into the frame accurately isn’t a confusing process. If you’re unsure how to attach it, you might want to contact a friend or business that does this type of thing.
How To Install Door Hinges: Final Thoughts
For those wondering how to install door hinges, following this step-by-step guide will ensure the installation process will go much more smoothly.